
Table of Contents
What is a Shoulder Dislocation?
The shoulder is the most likely joint in your body to dislocate. It often comes out of place during contact sports such as football, rugby, and martial arts. The ball and socket mechanism of the shoulder joint makes it very mobile. This allows your arm to get into all sorts of positions but also means it’s more vulnerable to dislocation.
There are a few different types of dislocation – treatment and prognosis differ for each type.
Shoulder dislocation often happens due to a blow to the shoulder, or fall on an outstretched arm. This usually happens during sports injuries, falls, and trauma. Complications of dislocation can include:
- Fracture of your clavicle (collarbone) or humerus
- Muscle, ligament, and tendon sprains and tears
- Damage to the nerves that pass near your shoulder, causing numbness and weakness
- Chronic shoulder instability – and post-traumatic inflammatory conditions such as shoulder synovitis, which makes you prone to having further injuries and dislocations, and may be associated with injuries such as a shoulder labral tear, where the cartilage that helps stabilize the joint is damaged.
When your shoulder dislocates, it can move forward, backwards, or downward. These are known as:
- Anterior dislocation
- Posterior dislocation
- Inferior dislocation
This is different from shoulder separation, which involves a separation of the AC joint rather than the shoulder joint itself.

In this guide, we will discuss these types of shoulder dislocation. We’ll also discuss the difference between a full and partial dislocation.
You can also check out our guide to the best exercises for shoulder dislocation.
Book a Consultation with Dr. Pamela Mehta, MD
The Best Orthopedic Surgeon in San Jose
Dr. Mehta is a board-certified orthopedic surgeon who can help you recover from your joint condition. If you:
- Are Suffering From Pain and Mobility Issues
- Need Orthopedic Assessment and Advice
- Want Treatment From a Top Orthopedic Doctor
We Can Help
Anterior Shoulder Dislocation
Anterior shoulder dislocation is where the top of your humerus (the “ball”) moves forwards and away from the glenoid cavity (the “socket”). It is by far the most common type of dislocation. Around 97% of shoulder dislocations are of this type.
The groups most commonly affected by anterior shoulder dislocation are:
- Young men due to sports injuries and trauma
- Older adults from falls and frailty
Anterior dislocation usually occurs due to forceful external rotation while the arm is out.
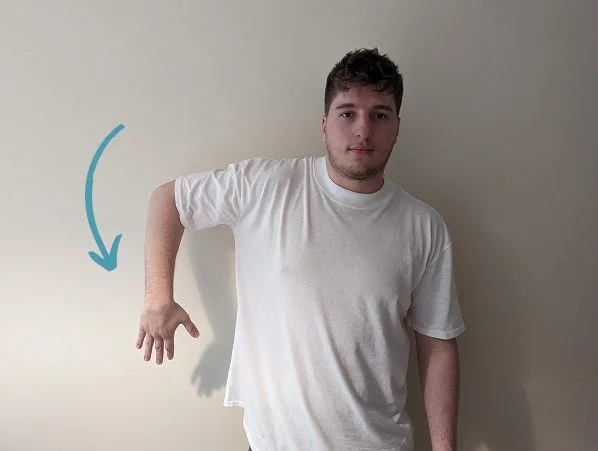
Let’s make that easier to understand. Hold out your arm horizontally with the elbow bent at 90 degrees so that your hand is pointing at the sky with your palm facing forward.
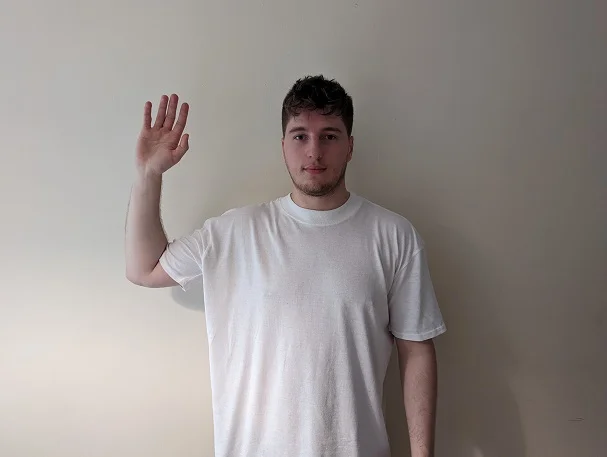
While keeping your upper arm horizontal and your elbow at 90 degrees, rotate your forearm so that it’s pointing at the ground.
Pretty easy, right?
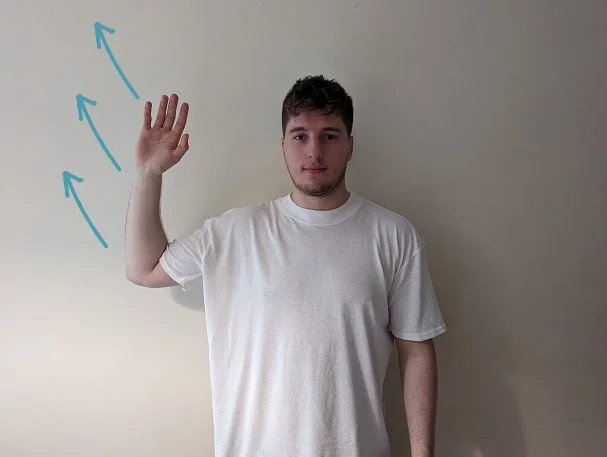
Now get into the original position and try to rotate your forearm in the opposite direction. If you’re keeping everything else still, you should feel discomfort in the front of your shoulder.
In anterior shoulder dislocation, a force is applying additional pressure in this position. Because your arm can’t move any further back, the “ball” part of your shoulder joint dislocates forward.
Signs of an anterior dislocation include:
- Pain in the shoulder with difficulty moving your arm
- A “bump” in your shoulder, meaning it loses the normally rounded appearance
- You may be able to feel the top of your humerus on the front of your arm, slightly below the shoulder joint
- When the most comfortable position for your arm is to hold it slightly out from your body
- Numbness in your arm (a sign of potential nerve damage)
Sometimes anterior dislocation requires shoulder surgery – either when the shoulder cannot be relocated with simple techniques, or when there is associated damage to the nerves, tendons, and muscles of the shoulder.
Minimally invasive shoulder surgery, such as shoulder arthroscopy, is the treatment of choice where simple measures have failed.
Anterior Dislocation Shoulder X-ray
An X-ray is the main, and often only, investigation required to diagnose an anterior shoulder dislocation. This is usually performed in the emergency room, giving your emergency medicine physician or orthopedic surgeon the ability to quickly diagnose and treat the problem without the need for more intensive tests like an MRI scan.
There are two main views used to diagnose anterior dislocation on X-ray: the AP (anteroposterior) view and the Y view. The AP view shows the front of the shoulder, while the Y view shows the top of the shoulder.
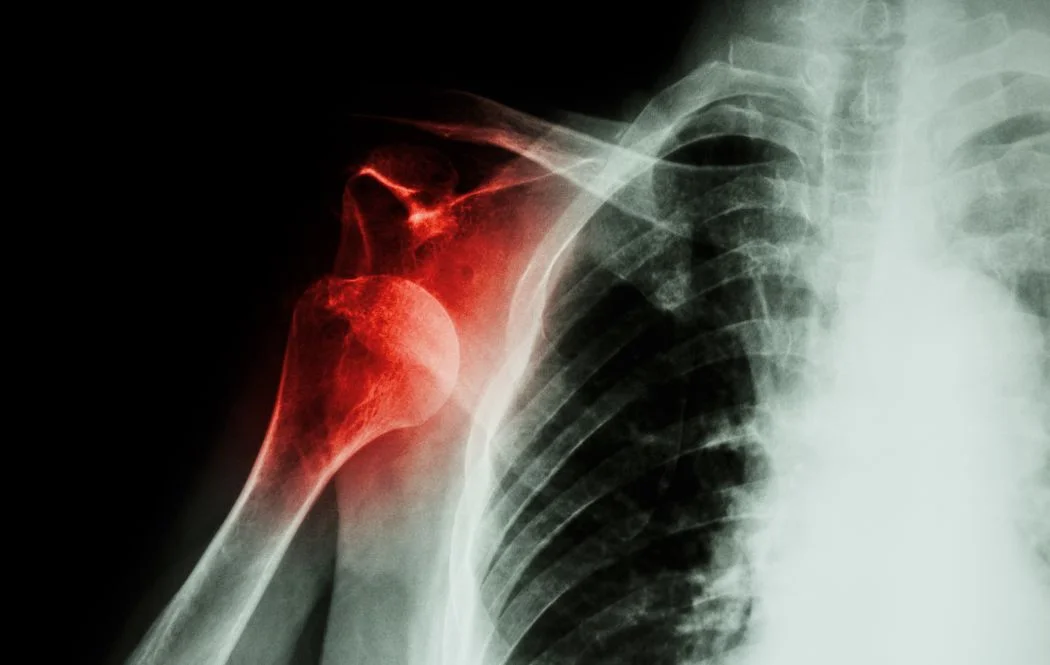
In a normal shoulder, the humeral head (the ball-shaped bone at the top of the arm) fits snugly into the glenoid fossa (the socket in the shoulder blade). In a dislocation, the humeral head has moved out of this socket.
On an X-ray, a shoulder dislocation will appear as a gap between the humeral head and the glenoid fossa. There may also be other signs of injury, such as fractures of the humeral head or the clavicle.
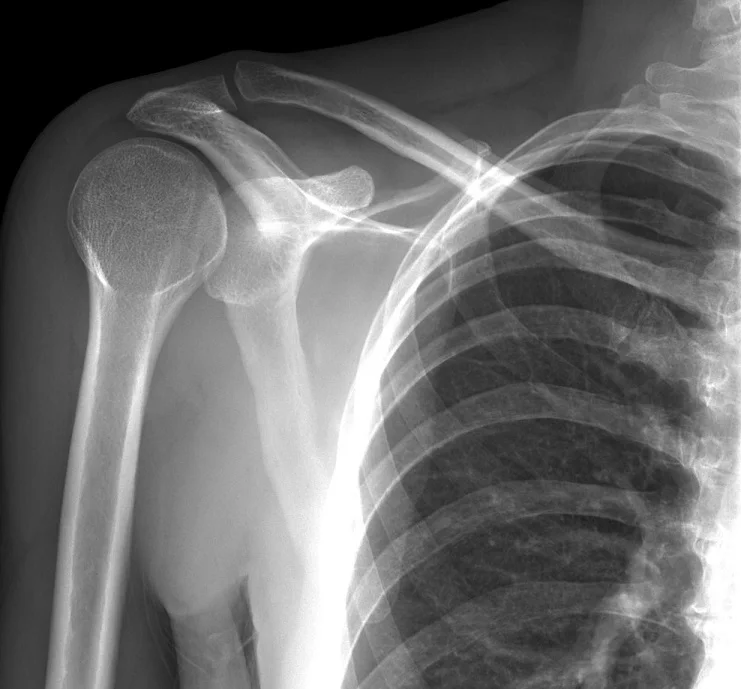
X-ray of a Dislocated Shoulder – Anterior
Below you can see Anterior-posterior views (AP) of two shoulder X-rays, comparing a normal shoulder X-ray with an anterior dislocation.
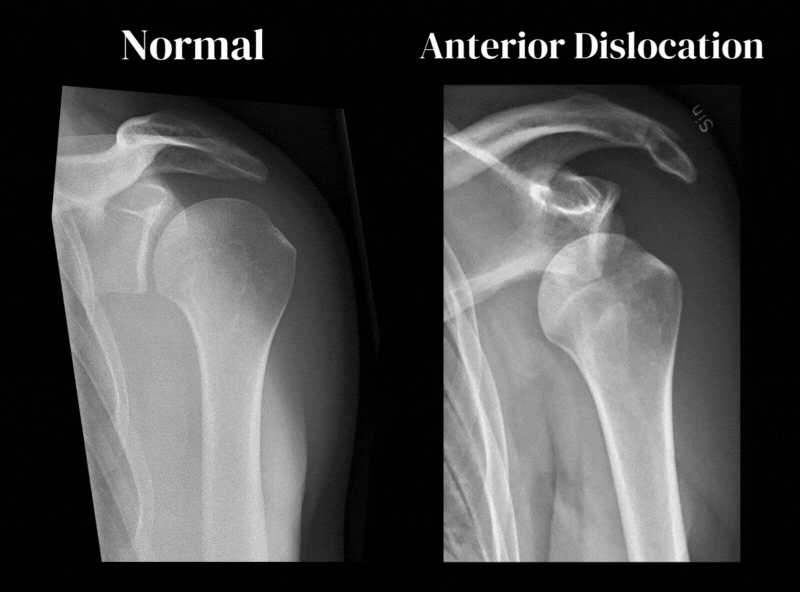
Here you can clearly see how the head of the humerus (the “ball”) has moved anteriorly (forwards) and no longer sits nicely against the glenoid fossa (the “socket”).
In most cases, an X-ray is the only investigation required to diagnose a dislocation. However, additional imaging tests, such as CT or MRI, may be needed to get a more detailed view of the injury.
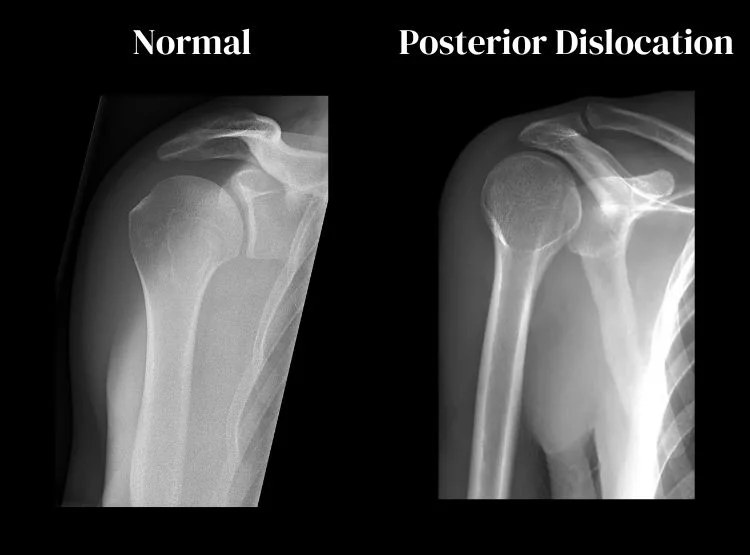
Posterior Shoulder Dislocation
Posterior shoulder dislocations are the second most common type of dislocation. This is where the shoulder dislocates and moves backward rather than forwards. These are uncommon compared to the anterior type, occurring in about 2-4% of all cases.
Young adult men are the group most affected by posterior shoulder dislocation. These usually occur due to trauma, such as in sports injuries or car accidents. Seizures can also cause posterior dislocations. Uncontrolled and violent movements during the seizure cause the shoulder to dislocate backward.
There is a risk that posterior dislocation can be misdiagnosed. This is because it is so much less common than anterior dislocation. If you have symptoms of shoulder dislocation but the initial X-ray is normal, further X-rays are needed.
Signs of a posterior shoulder dislocation include:
- Pain and loss of movement in the shoulder.
- An abnormal-looking shoulder – with bumps and dips instead of a smooth round appearance.
- Feeling relief when your arm is held in front of your torso with your elbow bent – like someone with their arm in a sling.
Complications are more likely the longer it takes to get treatment for dislocation. Almost a third of patients with posterior dislocation have an associated fracture. Because of this, an X-ray or CT scan must be taken before joint relocation is attempted.
Treatment for posterior dislocation may need more sedation and pain relief than usual. This type sometimes requires shoulder surgery – particularly if there is an associated fracture.
X-ray of a Dislocated Shoulder – Posterior
Posterior shoulder dislocations are missed on anteroposterior (AP) X-rays 50% of the time. This sets them apart from anterior dislocations, which are usually found on AP X-rays. If there are signs of dislocation, but the AP X-ray is normal, an axillary view X-ray should be taken. Another option is to investigate with an MRI scan.
These X-rays show a full posterior dislocation. Both anteroposterior and lateral views have been obtained to confirm diagnosis.
AP View
Lateral View
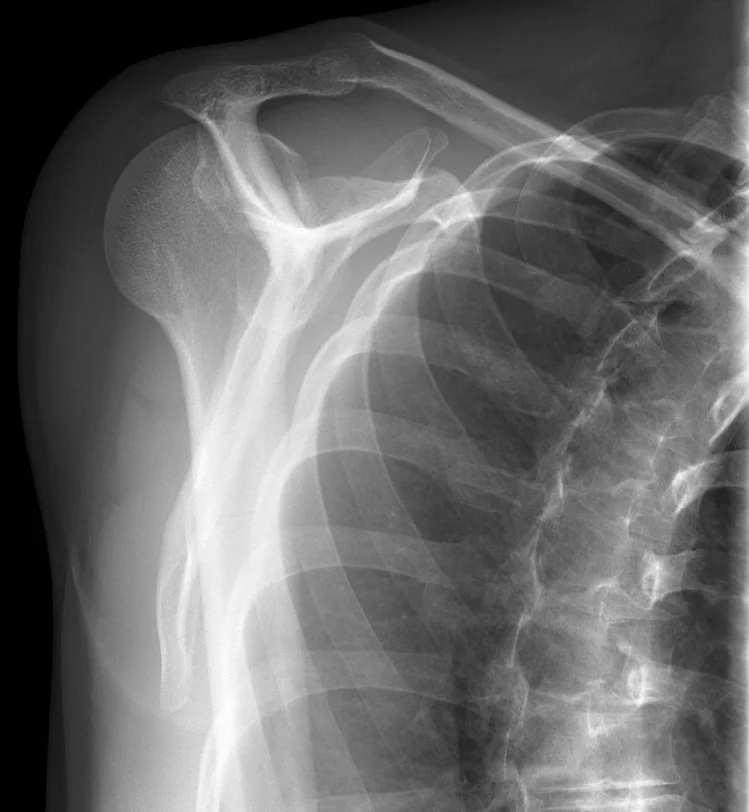
The humeral head (top of the upper arm bone) is fixed in internal rotation, meaning it has a rounded appearance. This is known as the lightbulb sign. The lightbulb sign is commonly seen on posterior shoulder dislocation X-rays.
MRI of a Posterior Shoulder Dislocation
This MRI scan of a posterior dislocation shows a “reverse Hills-Sachs defect”. This injury is often associated with posterior shoulder dislocation.

We use both MRI and CT scans to identify posterior dislocation and rule out fractures.
Inferior Shoulder Dislocation
Inferior shoulder dislocations are the rarest form of shoulder dislocation. They account for roughly 0.5% of cases. The name means that the humeral head (the “ball” of the shoulder joint) dislocates downwards. During dislocation it moves out of the glenoid cavity (the “socket”).
This form of dislocation is often referred to as luxatio erecta. This name comes from the typical presentation where the patient’s arm is held above their head.
Trauma is the most common cause of inferior shoulder dislocation. This could happen when someone holds their arm above their head to grab something as they fall. An example of this is when a motorbike rider falls off their bike with their arms reaching above their head. When their arm hits the ground, it faces extreme pressure and can dislocate downwards.
An inferior dislocation is typically very painful. It’s often associated with fractures and nerve injuries, causing numbness and weakness in the arm. When evaluated in a hospital, these injuries require careful clinical assessment. Imaging tests, such as X-Rays and MRI, help to examine the extent of the injury. Surgery is required if there is severe damage, or if the doctor cannot relocate the joint.
Even if your doctor relocates the joint without surgery, you will have reduced movement for 2-6 weeks. Many of those affected by inferior shoulder dislocation will suffer from recurrent dislocation.
Partial Shoulder Dislocation
Partial shoulder dislocation is also known as shoulder subluxation. This is when the head of the humerus partially comes out of the glenoid cavity but not completely.
Shoulder subluxation has similar symptoms to a full dislocation. However, the shoulder deformity might not be as clear. Symptoms include:
- Shoulder pain
- Difficulty moving your shoulder
- Swelling and deformity in the shoulder joint
- Numbness in your arm
In partial dislocations you may be able to move your arm, which is usually impossible in complete dislocation. There will be some discomfort or a catching sensation – particularly for overhead movements.
Partial shoulder dislocations are caused by sports injuries, trauma, and falls. In partial dislocation, the blow to the shoulder was not enough to fully dislocate the joint.
You’re more likely to have a shoulder subluxation if you’ve previously had a shoulder dislocation. This is also more common if you’ve been diagnosed with shoulder instability. The ligaments, muscles, and cartilage of your shoulder joint are damaged and looser. This makes abnormal movement of the humeral head out of the socket easier.
For this reason, it is important that you seek appropriate treatment after a partial or full dislocation. You will be given exercises and therapy to improve your joint strength. This can help to prevent recurrent dislocation.
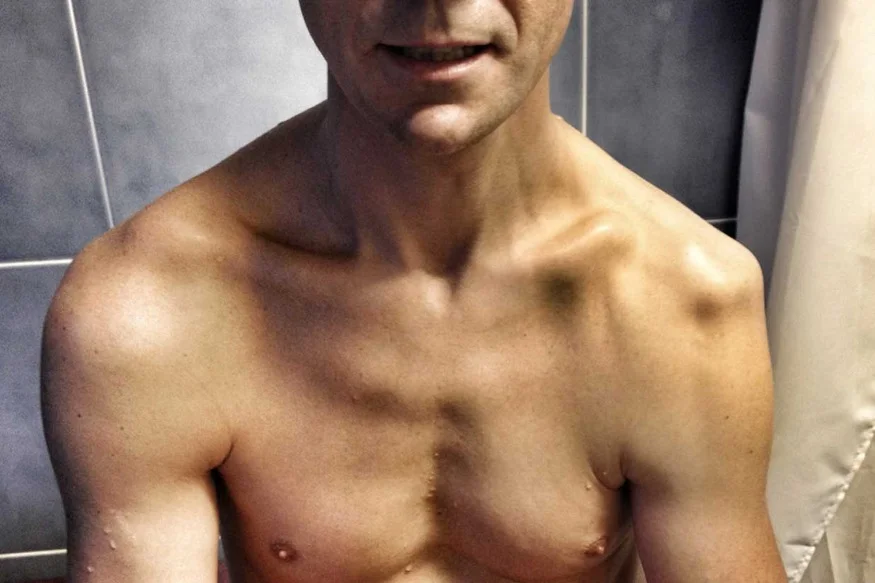
What Does a Dislocated Shoulder Look Like?
A dislocated shoulder is often visibly noticeable due to its altered shape and appearance. The severity of the dislocation often dictates the extent of these visible changes.
Common visual signs include:
- Deformity or Irregular Contours: The shoulder may lose its normal rounded shape, appearing flattened or having a prominent bulge in an unusual area. This is due to the displacement of the humeral head (the “ball”) from the glenoid cavity (the “socket”).
- Abnormal Positioning: The arm might hang in an unusual position, often slightly away from the body or turned in an unnatural way, depending on the type of dislocation.
- Swelling and Bruising: These are common reactions to the injury. The area may appear swollen or discolored.
- Limited Movement: Though not a visual sign, a person with a dislocated shoulder will generally have a limited range of motion and will likely be guarding or supporting their arm to minimize pain and discomfort.
It’s important to note that while these signs can indicate a dislocated shoulder, medical imaging, such as an X-ray or MRI, is often required for a definitive diagnosis.
Treatment
Treatment for shoulder dislocation depends on:
- The severity of the injury
- Whether you’ve suffered any of the complications
- What type of dislocation has occurred.
Many shoulder dislocations can be treated in the emergency department following careful assessment. Your treating clinician will use appropriate sedation and pain relief.
Here is an example of how a clinician relocates a dislocated shoulder. This should never be attempted by those without proper training:

If you’ve suffered a shoulder dislocation that has been relocated without surgery, you will have a few weeks of limited shoulder movement. You’ll need rehabilitation before you can fully move your arm again. It may also be difficult to sleep.
Your doctor may place your arm in a sling for a short time following a dislocation. Other rehabilitation activities your doctor may recommend include:
- Resting your affected arm for several weeks
- Avoiding any heavy lifting or awkward overhead movements
- Simple pain relief such as acetaminophen or ibuprofen
- Ice packs placed on your shoulder several times a day for the first few days
- Once the inflammation has improved, switching to heat packs
- Light exercises as directed by your orthopedist or physical therapist

Sometimes shoulder dislocation requires surgery to repair damaged tissue and treat complex dislocations.
You must always seek professional help following a shoulder dislocation. If you try to treat it yourself you may end up with nerve damage or an untreated fracture.
Can I Treat Shoulder Dislocation Myself?
You may have seen some people put the joint back in place themselves. This is often people who suffer from shoulder instability and have frequent dislocations. This can be dangerous, especially if this is your first dislocation. Shoulder dislocations are frequently associated with fractures, nerve injuries, and rotator cuff tears. If you try to treat it yourself, you may cause further damage or miss a treatable condition.
Before treatment, an anterior dislocation requires careful examination by a healthcare professional. This should be followed by an x-ray to check for fractures. If there are no complications, we can use a shoulder relocation technique to treat your joint.
Recurrent dislocation can be a problem after an anterior shoulder dislocation. This is particularly true if your first dislocation occurred at a young age. Those who had dislocation before 25 are likely to have another dislocation.
Differences Between Types of Shoulder Dislocation
| Type | Causes | Symptoms | Treatment | Prognosis |
|---|---|---|---|---|
| Anterior Shoulder Dislocation | Most common, usually due to sports injuries, trauma, or falls. Occurs from forceful external rotation while the arm is abducted and externally rotated. | Pain, difficulty moving the arm, a visible “bump” in the shoulder, numbness (potential nerve damage). | Shoulder surgery if simple measures fail, such as shoulder arthroscopy. | Varies depending on severity; surgery may be required for severe cases |
| Posterior Shoulder Dislocation | Second most common, often from trauma, sports injuries, car accidents, or seizures. | Pain, loss of movement, abnormal shoulder appearance, relief when arm is held in front of the torso. | More sedation and pain relief; sometimes surgery, especially if there’s an associated fracture. | Immediate treatment is crucial; delays can lead to complications. |
| Inferior Shoulder Dislocation (Luxatio Erecta) | Very rare, often due to trauma like falling with an arm reaching upwards. | Very painful, associated with fractures and nerve injuries causing numbness and weakness. | Surgery if severe damage or if joint can’t be relocated non-surgically | Recovery period of 2-6 weeks, potential for recurrent dislocation. |
| Partial Shoulder Dislocation (Subluxation) | Caused by sports injuries, trauma, falls, or pre-existing shoulder instability. | Shoulder pain, difficulty moving the shoulder, swelling, deformity, numbness. | Exercises and therapy to improve joint strength, prevent recurrent dislocation. | Management with physiotherapy and exercises, recurrence possible. |
Conclusion
So that’s everything you need to know about shoulder dislocation! We’ve covered all the different types of shoulder dislocation. We also discussed how to get your shoulder back to usual after you’ve suffered a dislocation.
If you suspect that you have dislocated your shoulder, don’t treat it yourself. Instead of risking a lifelong injury, book a consultation with an orthopedic doctor and get your recovery off to a good start.